
Sunday, September 30, 2012
Perfectly preserved Jar Vase with pink pirouette flowers
Friday, September 28, 2012
Banner for Gabrielle
 My sister came to visit with her stepdaughter Gabrielle and we planned a day of crafting that included making 3D cards using honeycomb paper and then we made a banner of rainbow colors (die cut with Pennant die- retired SU) and floret using the Designer Rosette die and diecut her name using silver glimmer paper (retired SU die also) to spell her name, tied it all with a green grosgrain ribbon so she could pack it up and take it home to hang it in her room to remind her of her visit.
 I couldn't ge the pictures ot line up side by side but it was really cute!
Thursday, September 27, 2012
Ghoulish Googlies Designer kit extras

Take a basic black CS and emboss with spider web folder. All the color inspiration came from the tag. Take (I think this is pear DSP- retired) but any green would work. Cut the corner on the green strip using the square punch to make it look like a banner or ribbon. Diecut the zigzag from finishing touches edgelets- fast becoming my go to die for borders- so fast and you get two pieces with one cut! LOOOOVE IT!
Versamark the mummy and the bat using a scrap piece of white CS and heat emboss using black EP and cut out. Mount with dimensionals. Stamp Boooo with versamark and emboss with black EP and color in the eyes with signo gel white pen then die cut with banner die. Add googly eye.
Mount it all as shown. I am having so much fun with this set! Easy card- hardest part is hand cutting the bat and the mummy- you know how much I hate cutting with scissors! When I did it flat against the tag it looked a bit boring. It is worth the 1 minute of effort to cut it out I think. Enjoy!
Wednesday, September 26, 2012
Perfectly Preserved Jar Vase in wisteria and eggplant

Playing around with the Jar as vase idea. Stamp the jar on scrap piece of white with versamark then emboss with clear embossing powder. heat set. color the water with a duaber and bashful blue. Stamp stems to match flower arrangement. Stamp the flowers with wisteria inkpad then use eggplant marker to spot color. Use a mask to avoid overlap (don't do it like me!) Stamp some extra on scrap pieces of white and cut it out. (Sorry folks, no die for this one) stamp one on the base of the card to look like you are going to put it in the vase and stamp the stems to match. Add flowers you cut out to the arragement to add some dimension. Stamp sentiment from lovely little labels and punch it out using matching punch. Tie linen thread around jar and add label using dimensional. I cleaned the stamp really well and used a marker to stamp a few of the flowers to stamp it on the side to look like some petals fell off. also daubered some bashful blue below the vase to ground it before I attached the jar. I use the scoring tool to add 2 score lines to the edge as shown.
 s
s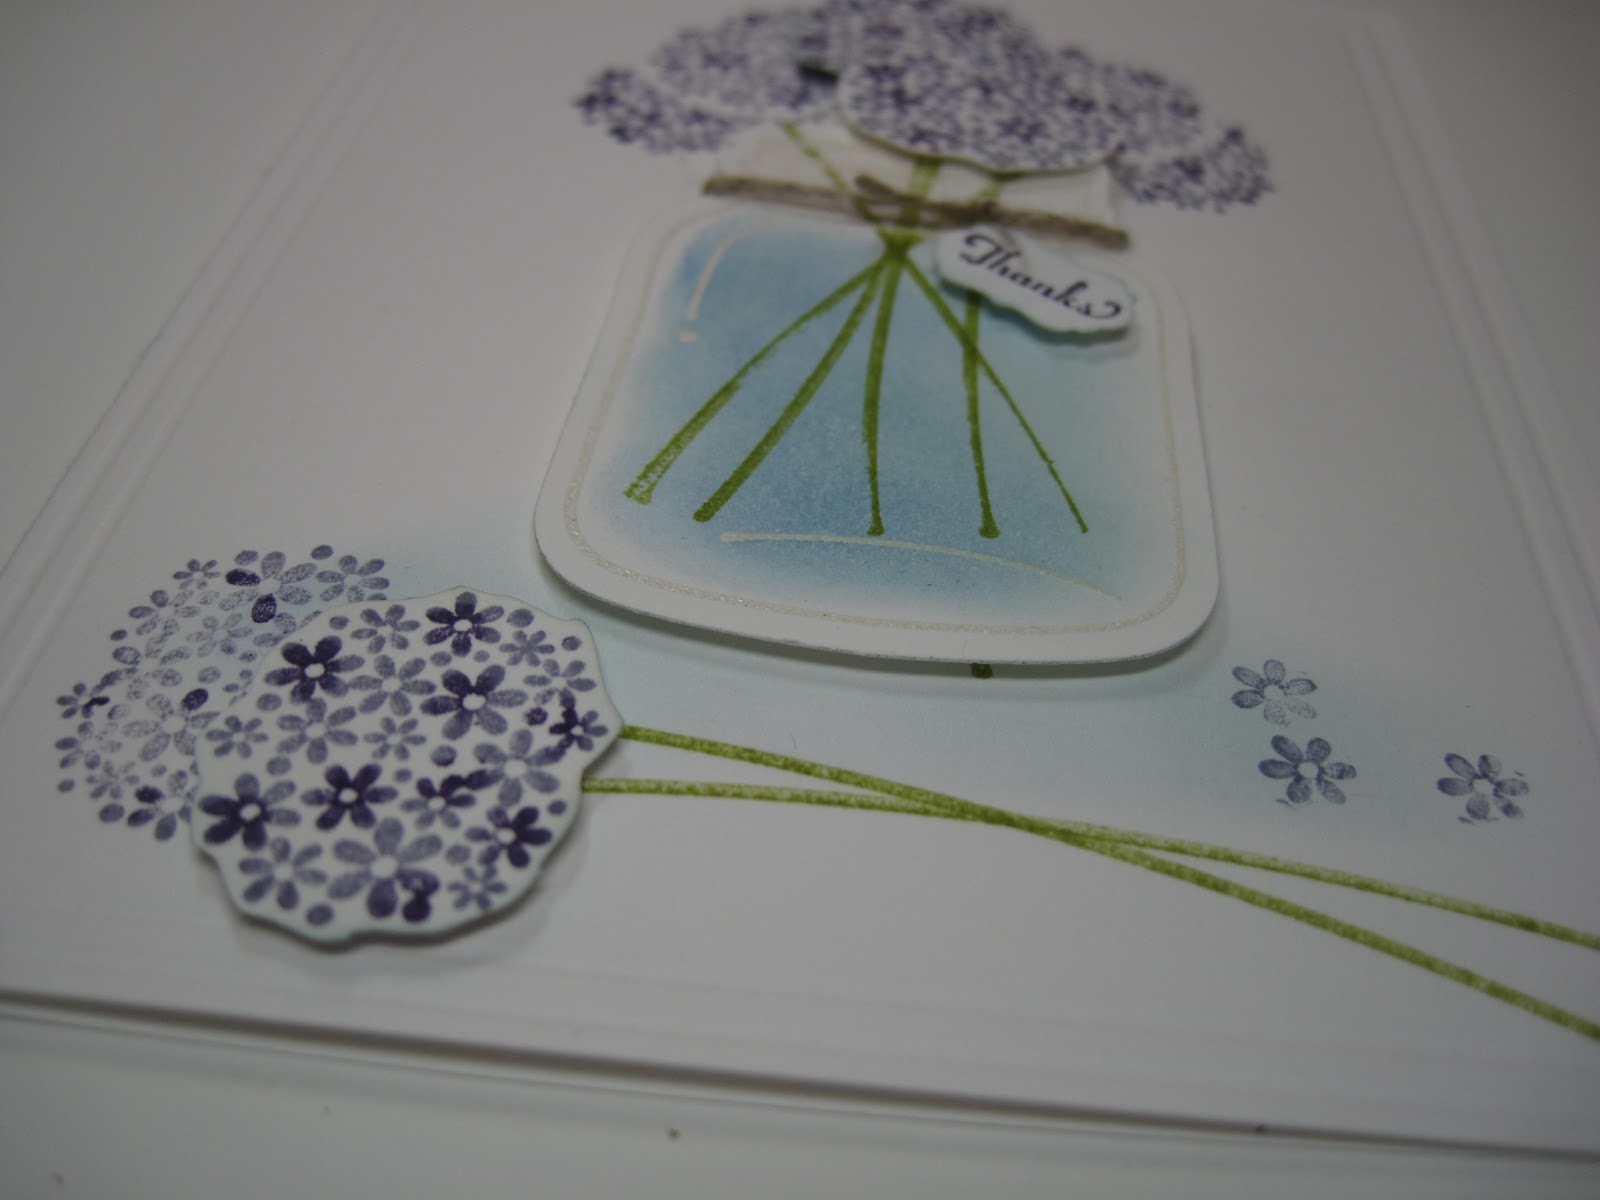
Tuesday, September 25, 2012
SCS challenge: perfectly preserved vase jar in navy and pacific blue

Take a base Sahara Sand card. I polka dot stamped Borderlines (SU retired) for TLC396 and the Chevron from Border Banter (from the holiday catalogue) with versamark then embossed it with white embossing powder. This was for the sketch challenge CAS189. Stamp the jar onto white with versamark and emboss in white or clear. Diecut it out. Stamp some stems in Limeade. Stamp some flowers with Pacific Blue pad then use a Night of Navy marker to color in some of the flowers to accent. Do this 4-5 times on the base card where you want the flowers to go and then 3 more times on a scrap piece of white CS. Cut out the white ones and mount with dimensionals. Stamp the sentiment from Lovely Little Labels with navy pad.
 Punch it out. Wrap linen thread around the jar and then tie off. Mount the little sentiment with dimensionals to make it look like a tag. I just fried up some green tomatoes that one of my friends gave me and it tastes just like autumn. Enjoy!

Monday, September 24, 2012
Batty Purse


Take a black purse diecut and emboss with the spider web embossing folder once- not embossing the top part. Use the left over paper from the purse to punch out 2 large ovals about 2/3 of the oval. I then used a 1/2 inch circle punch punched out scallop bottoms of the wings. Using the petite pennent builder punch

Fill with candy of your choice and give it to someone you like to say a Batty Hello!
Friday, September 21, 2012
Ornament Keepsakes for splitcoast challenge

Took Primrose base card and stamped the sentiment from Greeting of the Season in same color, added a strip of pink pirouette corner rounded and another layer of lucky limeade, embossed then corner rounded. Stamped the ornament in Primrose and accent in what else but limeade from Ornament Keepsakes set and diecut it out, added some dazzling diamonds glitter and then mounted with a dimensional and tied it off with a silver cord (retired SU). Definitely a easy 10 minute card.

Enjoy!
Lynda
Thursday, September 20, 2012
Perfectly Preserved Make and take

Don't you just love these matching stamps and diecut bundles?
Wednesday, September 19, 2012
Sharleen's Ornament Keepsakes variation

 Sharleen who has been coming to my parties for couple of years and she would either like something or not and when she saw the Holiday catalogue, she said "I love that and I want to make it but I want to use the champagne glimmer paper". So I had a special class and we spent this past Saturday morning making Ornaments - just like the one in the catalogue cover and then some but this one was our favorite. We made it double sided so it was really gorgeous. To make a one sided ornament diecut 20 larger ornament shapes using the champagne glimmer paper and 20 small ornaments in real red on vanilla cardstock. Cut 2 strips of 1 inch Candlelight Christmas DSP, diecut it using Designer Rosette die. Hot glue the Vintage facet button on the front and then a pearl on top.

So pretty!
Monday, September 17, 2012
Perfectly Preserved CASE

Sunday, September 16, 2012
Googly Ghouls trifold


Anyhow, is this not the cutest fold? I saw a trifold card like this while visiting amazingly talented Elizabeth Price and had to make one for myself using the design.
The basecard is basic black- I took a 4 1/4 x 11 cardstock and scored it at 4 1/8 then 8 1/2 then punched a 1 3/4 inch hole centered on the 8 1/2 score line as shown.

I punched dotted scallop ribbon in pumpkin pie and attached it to the back of the front flap to add a skinnhy scallop.


You could stamp a message under the cover and then add another message on the inside.
Enjoy! Lynda
Wednesday, September 5, 2012
Perfectly Preserved


Take a base of basic gray, then layer a chocolate chip embossed with woodgrain. I then took white CS diecut with with framelets from Stampin Up and poked holes to match using the stencil. Then I cut another framelet one size


So it was more of a 30 minute card but then who's counting?
Subscribe to:
Posts (Atom)